UBTgo FAQs
You will need the latest version of Adobe Acrobat Reader; you can download it from Adobe's Website.
Yes, paperless statements are free and are a convenient, safe, secure way to receive your checking and savings statements.
Yes, you must be enrolled in UBTgo to receive paperless statements.
To enroll via your web browser: Visit ubt.com/personal/online-mobile-banking and click the green Enroll Now button, then follow the prompts to create your account.
To enroll via your smartphone: Download the UBTgo app from either Apple's App Store (for Apple devices) or Google Play (for Android devices), then tap Register and follow the prompts to create your account.
If you are currently enrolled in online banking, you can enroll in paperless statements from UBTgo by selecting Accounts > Paperless Statement Enrollment. Check the box on the right-hand side of the page for the account(s) you wish to enroll and then click Save. A disclosures page will come up that provides terms and conditions, and you will be prompted to enter an paperless statement Confirmation Code. Once these steps are completed, your account(s) will be enrolled.
At Your Fingertips
When you switch to paperless statements, you’ll get a secure, convenient and environmentally friendly way to access your monthly statements.
- Receive an e-mail notification from Union Bank & Trust the day your statement is available.
- Access your last 24 months of account statements and check images by logging on to UBTgo Online Banking.
- View your statements 24-hours a day from anywhere with internet access.
- Download and save your statements to view whenever it is convenient for you.
One Less Thing to Think About
We’ll notify you by e-mail when your statement is available. Then simply log in and view up to 24 months of statements and check images.
Safer Than Paper
A paperless statement can’t be stolen from your mailbox, delivered to the wrong house, or taken from your trash. Plus, you use your secure Online Banking login to access your statements.
Good for Earth. Good for You.
When you sign up for paperless statements, you’re extending the life of our natural resources. Plus, they are a free way to help you manage your checking and savings statements faster and easier. Now that's green.
To enroll in paperless statements: Please log into UBTgo using your existing username and password. From there, select Accounts > Paperless Statement Enrollment, and follow the sign-up process.
No, the paperless statements is an electronic replacement for the paper statement. However, you may print your paperless statements, and/or save them to a disk or your hard drive.
Regardless of whether you are enrolled in paperless statements, you have access to the last 24 months' worth of statements within UBTgo.
To view/print a statement from Online Banking:
- Log into UBTgo and select Accounts>Statements
- Select the account for which you are wanting the statement(s).
- All statements available for that account for the last 24 months will be listed, with the most recent at the top.
- Click on the file(s) to download and save/open them.
- When the statement is open, select File>Print.
An paperless statement is an electronic mail notification sent to your e-mail address the day your statement is available to view in UBTgo. The paperless statement will replace your current paper statement, providing you immediate access to your account information.
You may enroll in paperless statements by logging into UBTgo and selecting Paperless Statement Enrollment from the secondary menu.
UBTgo is an online platform that lets you access your accounts from your personal computer or smart device 24 hours a day, seven days a week. You can review all the details of your Union Bank accounts, as well as check balances and track spending, transfer funds, verify payments, see if checks have cleared, access debit card controls, and access account statements.
To enroll via your web browser: Visit ubt.com/personal/online-mobile-banking and click the Sign Up link on the login box, then follow the prompts to create your account.
To enroll via your smartphone: Download the UBTgo app from either Apple's App Store (for Apple devices) or Google Play (for Android devices), then tap Register and follow the prompts to create your account.
Once logged into UBTgo, select "Payments". This will direct you to the Payment Center. This page will show a list of your available merchants to pay. Simply locate the merchant you wish to delete and click on their name - this will expand the information related to this payee.
At the very bottom of this pop up box, should be 3 options: "Save Changes", "Cancel" or "Remove..." - by selecting "Remove..." you will be asked once more if you want to delete that payee before it is officially removed.
Yes, you can export transactions from UBTgo via your web browser on a desktop or laptop computer. To download a file with your account activity that is compatible with Quicken/QuickBooks, log into UBTgo and select Accounts > Download for Quicken. Then, select the account and date range of activity and then click on either Download to Quicken or Download to QuickBooks.
You may also download activity in a file compatible with Excel. Once logged into UBTgo, select Accounts > Account Activity. Under the Account Selection & Transaction Search heading, select the account and search features, enter your parameters, and then click Spreadsheet to download.
Yes. Keeping financial and personal information about you secure and confidential is one of our most important responsibilities. Your information remains secure because our computer systems are protected in the following ways:
- Computer anti-virus protection detects and prevents computer viruses from entering our computer network systems.
- Firewalls block unauthorized access by individuals or networks.
Firewalls are one way. Union Bank protects its computer network systems that interact with the Internet - To ensure that information remains confidential, Union Bank uses encryption technology, such as Secure Socket Layer (SSL), on its web site to transmit information between you and the bank. This protects data in three key ways:
- Authentication ensures that you are communicating with us and prevents another computer from impersonating Union Bank.
- Encryption scrambles transferred data so that it cannot be read by unauthorized parties.
- Data integrity verifies that the information you send to Union Bank is not altered during the transfer. The system detects if data was added or deleted after you sent the message. If any tampering has occurred, the connection is dropped.
To access paperless statements via your web browser:
- Log into UBTgo and select Accounts > Statements
- Select the account for which you are wanting the statement(s). All statements available for that account for the last 24 months will be listed, with the most recent at the top.
- Click on the file(s) to download and save/open them.
- If you would like to print your statement, when the statement is open, select File > Print.
To access paperless statements via your smartphone:
- Log into UBTgo, tap the menu, and tap Accounts > Statements
- Select the account for which you are wanting the statement(s). All statements available for that account for the last 24 months will be listed, with the most recent at the top.
- Tap on a statement to open and view it.
To find checks on desktop: Within UBTgo, you may search for a specific check image. Once logged in, select Accounts>Account Activity. You can search for a specific check number or for any date range within the last 24 months. If an image is available for a transaction, there will be a small "check" icon under the item description. Clicking on that icon will open an image of the item in a new window, which can then be saved or printed.
To find checks within the mobile app: You can certainly review or research account activity within the mobile app; when you first log in, start by selecting the appropriate account. Once you're in the account page, you will have a magnifying glass icon in the top right-hand corner of your screen. By selecting this icon, you can filter your transaction search by type as well as dollar amount. You can also utilize the search bar to type in the name of a merchant or transaction description. One thing to note: If you know the specific check number you're looking for, please include the # symbol before the check number in your search field — for example, #1234
Check images are also available on your statements saved within UBTgo.
The UBTgo services offered for mobile devices — such as access to your accounts via a mobile web browser, the UBTgo app, and text banking — are free to use. However, your mobile provider's message and/or data rates may apply.
There is no fee to enroll or pay bills (vendors) electronically. Personal Bill Pay includes additional features, which do incur transaction fees, including:
- Same-day payment - $9.95 processing fee
- Overnight payment - $14.95 processing fee
Yes. If you have an iPhone or Android smart phone, you can go directly to the App store to download and enroll in UBTgo Mobile Banking. Search for Union Bank & Trust, then follow the on-screen prompts to get started.
You will have instant access to all the same information and services as UBTgo through the website.
For security purposes, no personal or financial information will be stored on your phone. You will need to log-in to your account each time you want to access your account information. Union Bank does not charge a fee for utilizing the Mobile Banking app; however, message and data rates may apply.
Yes. Mobile Banking is just as secure as Online Banking, offering the following safeguards:
- Authentication of user name/password 128-bit Encryption
- Transaction validation and reconciliation to detect fraud
- Specific software and server protection to guard against malicious attacks
- Full audit capabilities through event logs and reporting
Along with the implemented safeguards, Mobile Banking does not save any files with personal or financial information on your cell phone. All information stays strictly within Online Banking. Some phones may have logo and branding files that are copied to the device (app), however those files do not contain any personally identifiable information.
There are hundreds of models supported, as well as a number of different operating systems, including (but not limited to): Android, BlackBerry, iOS, Symbian, Windows Mobile, Linux, Palm webOS and Maemo.
Mobile Banking also works with most pre-paid plans; however, you will want to check with your provider to ensure that it supports standard U.S. short codes.
First, you will want to verify that you sent the request to Union Bank's unique short code: 441-98.
Also, you may need to check with your service provider to ensure that your phone is enabled to send and receive messages to and from a short code. You may also contact a UBTgo Support Specialist at 833-323-1454.
When using Bill Pay within UBTgo and selecting an option that incurs a fee, the fee will be displayed prominently on each page following that selection.
BillPay (including Zelle®) can be accessed by clicking on the Payments tab within UBTgo on your desktop or laptop computer's mobile browser.
From within the UBTgo mobile app, most BillPay features are available in the Move Money menu. You can access the full mobile BillPay site through the Payments option in the More menu.
Yes. Like any other transaction, if you do not have enough funds in your account to cover the BillPay payment, you will incur our standard NSF Paid Item Fee or NSF Returned Item Fee and Continuous Overdraft Fee as applicable.
CheckFree, our Bill Pay provider, guarantees all payments. If a payment is received late, CheckFree will cover a late fee, up to $50. BillPay Customer Service can be reached at 855-234-1241 between the hours of 6:00 AM - 12:00 Midnight CT, 7 days a week.
On desktop: To access the UBTgo BillPay system, sign into UBTgo and select the "Payments" tab.
Payee information can be found on the Payment Center screen.
- To set up a new vendor, click "Add a company or person to pay"
- To review scheduled payments, view the section called "Pending Payments" in the right column of the Payment Center screen.
- To make a payment, simply enter the amount and pay date next to the vendor name in the "Pay Bills" section.
Through the mobile app: You can access your BillPay connection by selecting the Move Money option located across the bottom of the app screen. Once selected, you will be provided with two new options; please select Pay Bills to connect to our BillPay services. To add a new payee within BillPay, you'll want to select Add Payee to begin the process
Transactions scheduled prior to 9:00 pm (Central Time) will be processed on the current business day. Transactions entered after 9:00 pm will be processed on the following business day (business day is every Monday through Friday, excluding federal holidays).
On an existing scheduled transfer, select the pencil icon to edit, or the trash can icon to delete, an existing scheduled transfer.
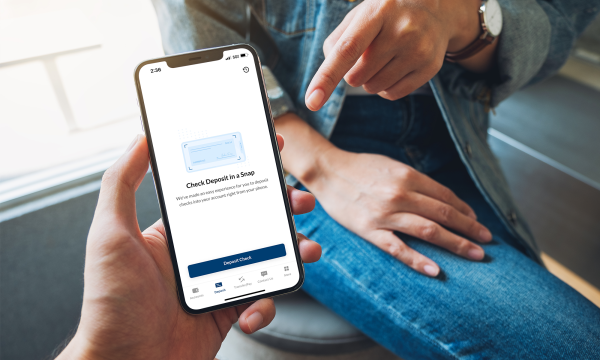
Before you begin the mobile deposit process, be sure to endorse the back of the check with "For Mobile Deposit Only at Union Bank" and your signature. Once you're logged into the UBTgo app, select Deposit on the bottom of the screen and then Deposit Check to begin the process. Your device's camera will prompt you to take a photo of the front of the check and then the back of the check. Once these images are captured, you may then select the appropriate account to receive the deposit as well as enter the amount of your check. Once this information is entered, you may select Deposit to submit your images and deposit to Union Bank & Trust.
Items deposited by 6 p.m. Central time typically post on the same business day.
- Endorse the back of your check with the words "For Mobile Deposit Only at Union Bank" along with your signature.
- Choose a place with bright, but indirect sunlight to avoid shadows when taking the photo.
- Place the check on a non-shiny surface against a background with a strong contrast between the check and surrounding area. Clear all objects away from the check like books, keys, change or other shiny objects that may interfere with transmission.
- Be sure that the check is flat.
- Hold the camera directly over check.
- Use the borders making sure the entire check fits within the space. Tap the screen on the check to focus the image.
- The check must contain a readable check number, payee name, and endorsement.
- The check must contain a readable MICR line at the bottom of the check.
- The check must contain a readable character (numeric amount of the check and legal amount of the check.
- The check must be drawn on an institution located within the United States.
- Write ‘Mobile Deposit, DATE (where DATE is the full date you deposited the check) on the front of the check.
- Securely store your check for 5 days after deposit submission and destroy after 14 days.
- Do not leave deposited checks lying around, do not put deposited checks in trash or recycle containers, unless they have been shredded first.
- When logged into UBTgo from your mobile device, click on the "Deposits" on the bottom of the screen, or from the Menu at the top of the screen, select "Deposit a Check"
- Be sure to endorse the back of the check with "For Mobile Deposit Only at Union Bank" and your signature
- Select the account you wish to deposit into
- Enter the amount of the check
- Take images of the front and back of the check
- Select "Make Deposit"
- Successful deposits will be listed under "View Deposit History"
Deposit Limits |
Funds Availability |
$3,000 daily deposit limit per user | Funds are normally received within two business days. Please keep your paper check until the funds are posted to your account. Once received, view your deposit status under Deposit History. |
Visit ubt.com or download the UBTgo mobile app. Choose the registration option and fill out all of the information asked for.
For UNL international students, faculty, and staff:
If you do not have a social security number, use the first four digits of your UNL Student ID number unless otherwise instructed. If you haven't gotten a U.S. phone number yet, fill in the phone number field with zeros.
The full account number is now available in both Desktop and Mobile in the account details section.
- Desktop – Select Account > Account Details is on the right side of the page > Select Show Full Account to display full account number
- Mobile – Select Account > Select Account Details icon > full account number is displayed
Current Balance is your most up-to-date balance, which includes pending activity, while your Available Balance reflects collected funds and identifies available funds for purchases and payments. The Available Balance may reflect differently from your Current Balance if you have pending or recent deposit activity.
You can freeze your card from the associated account screen.
You can manage real-time alerts and set limits from within the More menu on the new release of the UBTgo mobile app.
Yes, to enroll you will need to login to the mobile app. Tap the More menu and choose Quick Balance. Slide the toggle on. Once enabled, you will be able to toggle on the accounts for which you would like to see balances. After you've made your selections, tap Save. The next time you launch the app, tap Quick Balance in the bottom right of the login screen to see your account balances.
Pending transactions can be viewed within the app by tapping Pay Now button within the credit card account screen. This will sign you in to the credit card portal where you can access all of your UBT credit card information, transactions, and make payments.
If you have a UBT deposit account, you can easily make payments to your UBT loan using the Move Money feature within the mobile app. Log in, select Move Money from the menu, and setup a transfer from the deposit account to your loan.
If you do not have a UBT deposit account, please make your payment on our website here.
Within the UBTgo mobile app, accounts are organized by type of account (checking, savings, loans) and then alphabetically by nickname within that account type. You can manipulate the order of accounts within the account type by changing your accounts' nicknames (nicknames are available for loans, HELOCs, checking and savings). To change an account's nickname, click on the account. On the account screen, slide the account action options all the way to the right to tap Details. Within the Details drawer, select the Change button next to the account nickname. Type the new name and tap save.
You can view your mobile deposit history by visiting the Deposit section of the app and tapping the history icon in the top right corner.
You can force log out of the UBTgo mobile app by tapping the icon on the top right of the Accounts listing screen or by visiting the More menu and tapping the Sign Out option in the Security section.
Your email address or U.S. mobile phone number may already be enrolled with Zelle® at another bank or credit union. Call the Customer Support Team at 833.323.1454 and ask them to move your email address or U.S. mobile phone number to UBT so you can use it for Zelle®.
Once customer support moves your email address or U.S. mobile phone number, it will be connected to your UBT bank account so you can start sending and receiving money with Zelle® through the UBTgo mobile banking app and online banking.
If you don't know the person, or aren't sure you will get what you paid for (for example, items bought from an online bidding or sales site), you should not use Zelle® for these types of transactions.
These transactions are potentially high risk (just like sending cash to a person you don't know is high risk). Neither UBT nor Zelle® offers a protection program for any authorized payments made with Zelle® – for example, if you do not receive the item you paid for or the item is not as described or as you expected.
Keeping your money and information safe is a top priority. When you use Zelle within our mobile app or online banking, your information is protected with the same technology we use to keep your bank account safe.
Yes! They will receive a notification via email or text message.
Money sent with Zelle® is typically available to an enrolled recipient within minutes1.
If you send money to someone who isn't enrolled with Zelle®, they will receive a notification prompting them to enroll. After enrollment, the money will move directly to your recipient's account, typically within minutes1.
If your payment is pending, we recommend confirming that the person you sent money to has enrolled with Zelle® and that you entered the correct email address or U.S. mobile phone number.
If you're waiting to receive money, you should check to see if you've received a payment notification via email or text message. If you haven't received a payment notification, we recommend following up with the sender to confirm they entered the correct email address or U.S. mobile phone number.
Still having trouble? Please contact Customer Support.
1) Transactions typically occur in minutes when the recipient’s email address or U.S. mobile number is already enrolled with Zelle®.
You can only cancel a payment if the person you sent money to hasn't yet enrolled with Zelle. To check whether the payment is still pending because the recipient hasn't yet enrolled, you can go to your activity page, choose the payment you want to cancel, and then select "Cancel This Payment."
If the person you sent money to has already enrolled with Zelle, the money is sent directly to their bank account and cannot be canceled. This is why it's important to only send money to people you trust, and always ensure you've used the correct email address or U.S. mobile number when sending money.
If you sent money to the wrong person, we recommend contacting the recipient and requesting the money back. If you aren't able to get your money back, please contact Customer Support.
Scheduled and recurring payments are not sent with Zelle. You can cancel a payment that is scheduled in advance if the money has not already been deducted from your account.
In order to use Zelle®, the sender and recipient's bank accounts must be based in the U.S.
When you enroll with Zelle® through your online banking Bill Pay account, or mobile banking app, your name, the name of your financial institution, and the email address or U.S. mobile number you enrolled is shared with Zelle® (no sensitive account details are shared – those stay with your financial institution).
When someone sends money to your enrolled email address or U.S. mobile number, Zelle® looks up the email address or mobile number in its "directory" and notifies your financial institution of the incoming payment. Your financial institution then directs the payment into your bank account, all while keeping your sensitive account details private.
You can find a full list of participating banks and credit unions live with Zelle® at https://www.zellepay.com/.
If your recipient's financial institution isn't on the list, don't worry! The list of participating financial institutions is always growing, and your recipient can still use Zelle® by downloading the Zelle® app for Android and iOS.
To enroll with the Zelle® app, your recipient will enter their basic contact information, an email address and U.S. mobile number, and a Visa® or Mastercard® debit card with a U.S. based account (does not include U.S. territories). Zelle® does not accept debit cards associated with international deposit accounts or any credit cards.
It's easy — Zelle® is already available within UBTgo mobile banking app and online banking within Bill Pay! Sign-in on the desktop and follow a few simple steps to enroll with Zelle® today.
Zelle® is a great way to send money to family, friends, and people you are familiar with such as your personal trainer, babysitter or neighbor2.
Since money is sent directly from your bank account to another person's bank account within minutes1, Zelle® should only be used to send money to friends, family and others you trust.
Neither UBT nor Zelle® offers a protection program for any authorized payments made with Zelle® – for example, if you do not receive the item you paid for or the item is not as described or as you expected.
1) Transactions typically occur in minutes when the recipient’s email address or U.S. mobile number is already enrolled with Zelle® .
2) Must have a bank account in the U.S. to use Zelle® .
If you have already enrolled with Zelle® , you do not need to take any further action. The money will move directly into your bank account, typically within minutes1.
If you have not yet enrolled with Zelle® , follow these steps:
- Click on the link provided in the payment notification you received via email or text message.
- Select your financial institution.
- Follow the instructions provided on the page to enroll and receive your payment. Pay attention to the email address or U.S. mobile number where you received the payment notification - you should enroll with Zelle® using that email address or U.S. mobile number to ensure you receive your money.
1) Transactions typically occur in minutes when the recipient’s email address or U.S. mobile number is already enrolled with Zelle® .
You can send, request, or receive money with Zelle® .
- To get started, log into online banking or your mobile app, navigate to Bill Pay and select "Send Money with Zelle®". Accept terms and conditions, enter your email address or U.S. mobile phone number, receive a one-time verification code, enter it, and you're ready to start sending and receiving with Zelle® .
- To send money using Zelle® , simply add a trusted recipient's email address or U.S. mobile phone number, enter the amount you'd like to send and an optional note, review, then hit "Send." In most cases, the money is available to your recipient in minutes1.
- To request money using Zelle® , choose "Request," select the individual(s) from whom you'd like to request money, enter the amount you'd like to request, include an optional note, review and hit "Request"3.
- To receive money, just share your enrolled email address or U.S. mobile phone number with a friend and ask them to send you money with Zelle®.
1) Transactions typically occur in minutes when the recipient’s email address or U.S. mobile number is already enrolled with Zelle® .
2) Must have a bank account in the U.S. to use Zelle® .
3) In order to send payment requests or split payment requests to a U.S. mobile number, the mobile number must already
enrolled with Zelle® .
You can send money to friends, family and others you trust2.
Since money is sent directly from your bank account to another person's bank account within minutes1, it's important to only send money to people you trust, and always ensure you've used the correct email address or U.S. mobile number.
1) Transactions typically occur in minutes when the recipient’s email address or U.S. mobile number is already enrolled with Zelle® .
2) Must have a bank account in the U.S. to use Zelle® .
Zelle® is a fast, safe and easy way to send money directly between almost any bank accounts in the U.S., typically within minutes1. With just an email address or U.S. mobile phone number, you can send money to people you know and trust, regardless of where they bank2.
1) Transactions typically occur in minutes when the recipient’s email address or U.S. mobile number is already enrolled with Zelle® .
2) Must have a bank account in the U.S. to use Zelle® .
If enrolling in Zelle® and Billpay for the first time through the mobile app, you'll need to visit the "More" section of the app. Scroll down to the lower section and select "Payments" and follow the prompts to start sending money with Zelle® . Watch a short video here.
Once enrolled in BillPay and/or Zelle® , you'll have a Zelle® icon available from the "Move Money" section of the app.
Account aggregation is a service provided by some online financial and payment providers that allows their users to consolidate or link personal financial account information from their various online financial relationships. It’s important to note that account aggregation only allows these providers to download past transactions and display balances, not make transactions.
Account aggregators register at each financial institution using credentials provided by you, the client. From there, they use “screen scraping” or an application programming interface (API) to gather and display your transaction and balance information. An API provides better security than screen scraping.
When using account aggregation, it’s important to weigh the convenience and benefits with the inherent risks of sharing your personal credentials and having all your financial information stored in one location. It’s equally important to fully understand the privacy terms and conditions and data security methods of any third-party account aggregation service provider you utilize.
Please note, UBT doesn't support third-party applications utilizing account aggregation with which we do not have a direct relationship. UBT’s security policy also doesn't allow third-party account aggregators to log in on behalf of our customers without their intervention.
UBT clients should contact their third-party account aggregator or service provider directly if they experience the any of the following issues:
- Problems linking your UBT account(s) — fails after selecting account
- Ability to display some but not all UBT accounts
- Issues or questions concerning the exporting or downloading of transactions from your UBT account to third-party sites or dashboards
Authentication issues: In some cases, your authenticator might fail on login or you may receive a message saying there is a problem with your bank.
- Log in to your UBTgo account to verify you have the correct login credentials (username, password) and that multifactor authentication is correctly set up. It’s also good to ensure there are no updates to UBT’s Terms and Conditions that require acceptance. If none of these conditions exist, contact your third-party service provider for further support.
- Important note: None of the current third-party account aggregators accept cookies. This means that each login from these aggregators is recognized as a new device triggering MFA every time.
Account issues: The third-party aggregator or service provider cannot find the right account.
- Tip: Try manually linking your account. Some payment companies allow account connection via routing number and account number. If this doesn’t work, contact your third-party service provider for further support.
Some small businesses are able to receive payments with Zelle®. Ask your favorite small business if they accept payments with Zelle®. If they do, you can pay them directly from your mobile app using just their email address or U.S. mobile number.
Neither UBT nor Zelle® offers a protection program for any authorized payments made with Zelle®, so you should only send money to people (and small businesses) you trust. Always ensure you’ve used the correct email address or U.S. mobile number when sending money.
Yes. You can set up your loan payments with an external account in the same way you would with a UBT account.
If you’re paying from a UBT account prior to 9 p.m. CT on a business day, the payment will process on that same business day. If it’s after 9 p.m. CT on a business day or it’s a weekend or holiday, the payment will process on the next business day.
If you’re paying from a non-UBT account and submit your payment prior to 3 p.m. CT on a business day and you select the same day as the transfer date, the loan payment will credit on the next business day. If the payment is submitted after 3 p.m. CT on a business day or it’s a weekend or holiday, the earliest date available for you to select as the transfer date is the next business day. Your loan payment will then be credited within two business days.
Zelle®️ QR code provides peace of mind knowing you can send money to the right person, without typing an email address or mobile number.
To locate your Zelle®️ QR code, log into UBTgo, click “Send Money with Zelle®️”. Next, go to your “Zelle®️ settings” and click “Zelle®️ QR code” and your QR code will be displayed under “My Code”. From here you can view your QR code and use the print or share icons to text, email or print your Zelle®️ QR code. To receive money, just share your Zelle®️ QR code.
To send money, log into UBTgo, click “Send money with Zelle®️”, click “Send,” then click on the QR code icon displayed at the top of the “Select Recipient” screen. Once you allow access to your camera, simply point your camera at the recipient’s Zelle®️ QR code, enter the amount, hit “Send,” and the money is on the way! When sending money to someone new, it’s always important to confirm the recipient is correct by reviewing the displayed name before sending money.
Zelle® QR code provides peace of mind knowing you can send and receive money, without typing an email address or U.S. mobile number.
To locate your Zelle® QR code, log into the UBTgo, click "Send Money with Zelle®". Next, go to your "Zelle® settings" and click "Zelle® QR code" and your QR code will be displayed under "My Code". From here you can view your QR code and use the print or share icons to text, email or print your Zelle® QR code. To receive money, share your Zelle® QR code.
To send money, log into the UBTgo, click "Send money with Zelle®", click "Send," then click on the QR code icon displayed at the top of the "Select Recipient" screen. Once you allow access to your camera, simply point your camera at the recipient's Zelle® QR code, enter the amount, hit "Send," and the money is on the way! When sending money to someone new, it's always important to confirm the recipient is correct by reviewing the displayed name before sending money.
Simply log into the UBTgo or online banking and select “Send Money with Zelle®.” Then, enter an email address or U.S. mobile number to connect to your small business bank account.
Important note: If you already use Zelle® for personal use, you must use a different email address or U.S. mobile number than the one you used to enroll your personal bank account. For example, name@email.com would be connected to your personal checking account, and 555-555-1234 would be connected to your small business bank account.
There are a few ways you can encourage your customers to pay you with Zelle®.
- Tell customers verbally that you accept payments with Zelle®, and that they can easily send you money right from their banking app.
- Include it on an invoice. We recommend adding “I accept payments with Zelle®” or “Pay me with Zelle®”.
- Use Zelle® to request money from your customers (which will send them a notification telling them you’ve requested payment with Zelle®).2
- Download Zelle® marketing assets for free from zellepay.com and add them to your website, social media and more!
Please note, you’ll only be able to receive payments from consumers using Zelle® through their financial institution’s banking app. You will not be able to receive payments from consumers enrolled in the Zelle® app.
In order to use Zelle®, the sender and recipient's bank or credit union accounts must be based in the U.S.
Please call Union Bank & Trust at TBD so we can help you.
Whether you use Zelle® with a small business account or a consumer account, Zelle® uses the same network to initiate payments to small businesses and consumers. Consumers who are already enrolled with Zelle® through their banking app don’t need to do anything different to send money to a small business. The experience is slightly different for small businesses, as small businesses cannot currently send payments to or receive payments from consumers who are only enrolled in the Zelle® app.1
Keeping your money and information secure is a top priority for Union Bank & Trust. When you use Zelle® within our mobile app or online banking, your information is protected with the same technology we use to keep your Union Bank & Trust account safe.
Please contact our customer support team at TBD. Qualifying imposter scams may be eligible for reimbursement.
No, Zelle® payments cannot be reversed.
You can only cancel a payment if the small business or consumer you sent money to hasn’t yet enrolled with Zelle®. To check whether the payment is still pending because the recipient hasn’t yet enrolled, you can go to your activity page, choose the payment you want to cancel, and then select “Cancel This Payment.” If you do not see this option available, please contact our customer support team at TBD for assistance with canceling the pending payment.
If you send money to a small business or consumer that has already enrolled with Zelle® through their bank or credit union’s mobile app, the money is sent directly to their bank account and cannot be canceled. This is why it’s important to only send money to people you know and trust, and always ensure you’ve used the correct email address or U.S. mobile number when sending money.
If you try to send money to a consumer who is enrolled in the Zelle® app, the payment won’t go through and a message will pop up to let you know the payment cannot be completed. With small business accounts, Zelle® does not currently support sending or receiving money to users enrolled in the Zelle® app.
If you sent money to the wrong person, please immediately call our customer support team at TBD so we can help you.
Zelle® does not offer purchase protection for payments made with Zelle®. tbd
No, Union Bank & Trust does not charge any fees to use Zelle® with a small business account.
Your mobile carrier's messaging and data rates may apply.
Eligible small business accounts can send, receive, or request money with Zelle®. To get started, log into the UBTgo or online banking. In the main menu, select "Transfer and Pay". Then "Send money with Zelle®".
Enter your email address or U.S. mobile number, receive a one-time verification code, enter it, accept the terms and conditions, and you’re ready to start sending and receiving money with Zelle®.
To send money with Zelle®, simply select someone from your mobile device’s contacts (or add a trusted recipient’s email address or U.S. mobile number), add the amount you’d like to send and an optional note, review, then hit “Send.” In most cases, the money is available to your recipient in minutes.1
If the small business or consumer you send money to has already enrolled with Zelle® through their banking app, the money is sent directly to their bank account and cannot be canceled. It’s important to only send money to people you trust, and always ensure you’ve used the correct email address or U.S. mobile number when sending money.
To receive money using Zelle® with a small business account, share your enrolled email address or U.S. mobile number with your customers and ask them to send you payment with Zelle® right from their banking app. No need to share any sensitive account details. After the consumer sends you payment with Zelle®, you will receive your money directly into your enrolled bank account.
To request money using Zelle® with a small business account, click “Send Money with Zelle®,” select “Request,” enter the individual’s email address or U.S. mobile number, confirm the recipient is correct and tap “Request.”2
If your customer is using Zelle® through their banking app, they’ll be able to pay you with Zelle®. You’ll receive a payment notification once your customer has sent you money in response to your request. If your customer is enrolled in the Zelle® app, they will not be able to send you money with Zelle®, and you should arrange for a different payment method.
App Store is a service mark of Apple Inc. Apple and the Apple logo are trademarks of Apple Inc, registered in the U.S. and other countries. Android, Google Play, and the Google Play logo are trademarks of Google Inc. Data charges may apply. Check with your mobile phone carrier for details. Zelle and the Zelle related marks are wholly owned by Early Warning Services, LLC and are used herein under license.
1 Transactions typically occur in minutes when the recipient's email address or U.S. mobile number is already enrolled with Zelle. Must have a bank account in the U.S. to use Zelle.
2 In order to send payment requests or split payment requests to a U.S. mobile number, the mobile number must already be enrolled with Zelle.
Copyright © 2023. All rights reserved.